Showing posts with label cake. Show all posts

Thursday, March 03, 2011

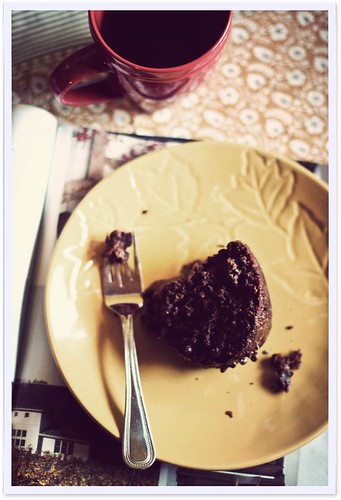
Browned Butter Cake with Cinnamon Chocolate Frosting


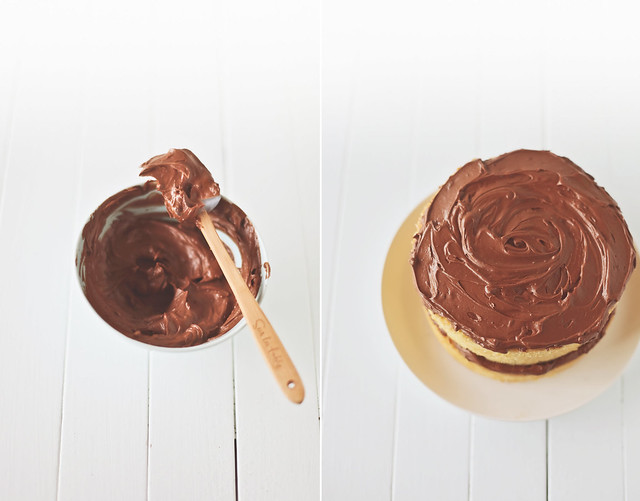
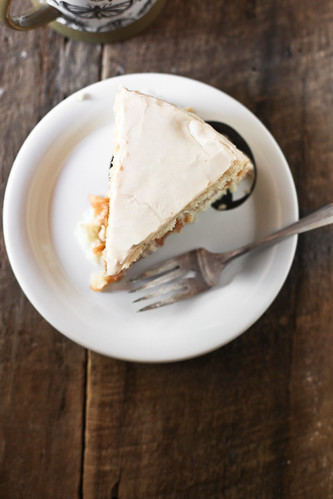
brown butter cake with cinnamon chocolate frosting.

I still remember the first time I smelled brown butter. It was 2 years ago, when I made these brown butter toffee blondies. I just couldn’t believe butter could smell like that. So nutty, so different from butter in its normal state. I’ve been smitten with it since.

cc-2-3

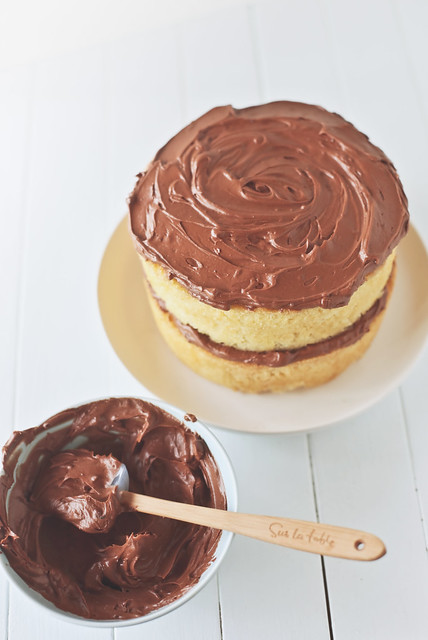
So when I was trying to find a cake to go with my favorite frosting ever, brown butter was the first thing I thought of. Brown butter cake with cinnamon chocolate frosting? Sounded perfect to me.

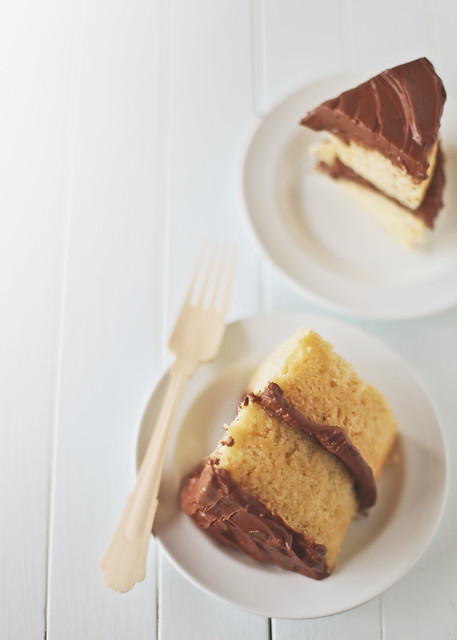
cake-2-2

And oh, it is. I’m in love with this cake. I want to bake it every day. I’m not the biggest frosting fan in the world, but I can’t help licking this off the spatula. There’s just something about chocolate and cinnamon together that makes me want to do a happy dance.

Both of these recipes are from one of my favorite blogs, the little red house. Sheena is adorable and lovely and takes beautiful pictures. Be sure to hop over there and say hi.

IMG_6772 copy-2

Brown Butter Cake with Cinnamon Chocolate Frosting
From the little red house

(the cake recipe is for cupcakes, but if you’d like to make cake, just pour the batter into two cake pans and bake them for about 30 minutes)

Cake
2 cups sugar
4 eggs
1 cup milk
3/4 cup browned butter*
1 tsp vanilla
2-1/2 cups all-purpose flour
2-1/4 tsp baking powder


*To brown butter:
Heat pan on medium heat.
Cut butter in to pieces and melt in pan.
Stir continuously. Butter will foam up.
After foam subsides, small brown flecks will start to appear in bottom of pan.
Continue stirring, until butter has reached a nice brown color, and nutty aroma.
When you want to lick the spoon, you know it's ready.
Turn the heat all the way down.


Preheat oven to 350°
Prepare cupcake pans with liners.
Beat sugar and eggs together until slightly thickened, about a minute.
Add milk, browned butter, and vanilla, stirring just until combined.
Add flour and baking powder, beating until well mixed--about a minute. Don't over mix.

Bake in preheated oven for 18-22 minutes, until tops are springy to the touch or a toothpick poked into the center comes out clean.
Remove from cupcake pan and allow to cool completely before frosting.

Frosting
(I doubled this for my cake, and I also went about it a bit differently because I didn’t want super thick icing). After beating the butter, I added the cocoa, cinnamon and vanilla, and mixed it in. Then I added the cooled chocolate, and then about a cup of powdered sugar.)

5oz good quality semisweet or bittersweet chocolate
8 TBS butter, at room temperature
3 cups powdered sugar
2TBS baking cocoa
1 tsp mexican vanilla
1/2 tsp cinnamon
4-8 TBS milk

Melt chocolate in a double boiler and allow to cool to room temperature.
Beat in butter until creamy. Add in melted chocolate.
Add powdered sugar, baking cocoa, cinnamon and vanilla.
Slowly beat in milk 1TBS at a time until you reach desired consistency.

enjoy!

Tuesday, October 05, 2010

Caramel Cake with Apple Filling

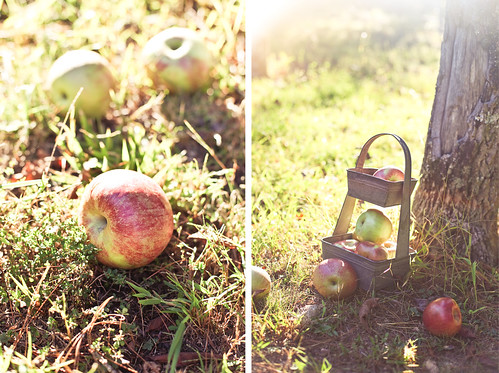
apple pickin'

Fall snuck up on me this year. One day it was hot and humid, the next it was all golden leaves and cooler temperatures. The last few days have been down right chilly. I’m not complaining, I’m celebrating. Fall is my very favorite season!

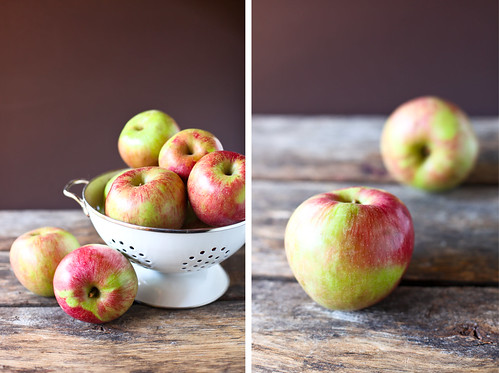
winesaps

The cake is quintessential fall. The richness of the caramel icing and the sweetness of the apple filling are things that just cant be fully appreciated in the heat of the summer. They need a cool breeze to feel at home.

It’s inspired a recipe in the September issue of Food and Wine, a cake called the Revelatory Cake. It’s from the cookbook The Southern Foodways Alliance Community Cookbook, which I cannot wait to get my hands on. It’s co-written by John T. Edge, whose work I have admired since I first heard about him on The Splendid Table.

Mine is quite different from the original though. I used Dorie Greenspan’s Perfect Party Cake and filled mine with an apple filling. The icing is the only thing I used from the original recipe, and it is delicious.

Enjoy!

caramel cake with apple filling

Perfect Party Cake
from Baking: From My Home To Yours

For the Cake:

2 1/4 cups cake flour
1 tablespoon baking powder
1/2 teaspoon salt
1 1/4 cups whole milk or buttermilk
4 large egg whites
1 1/2 cups sugar
1 stick (8 tablespoons) unsalted butter, at room temperature
2 teaspoons vanilla extract

Center a rack in the oven to 350 degrees F. Butter two 9-x-2-inch round cake pans and line the bottom of each pan with a round of buttered parchment or wax paper. Put the pans on a baking sheet.

Sift together the flour, baking powder and salt.
Whisk together the milk and egg whites in a medium bowl.
Put the sugar and the butter in the bowl of an electric mixer and, working with the paddle or whisk attachment, or with a hand mixer, beat at medium speed for a full 3 minutes, until the butter and sugar are very light. Beat in the extract, then add one third of the flour mixture, still beating on medium speed. Beat in half of the milk-egg mixture, then beat in half of the remaining dry ingredients until incorporated. Add the rest of the milk and eggs, beating until the batter is homogeneous, then add the last of the dry ingredients.

Finally, give the batter a good 2-minute beating to ensure that it is thoroughly mixed and well aerated. Divide the batter between the two pans and smooth the tops with a rubber spatula.

Bake for 30 to 35 minutes, or until the cakes are well risen and springy to the tough – a thin knife inserted into the centers should come out clean. Transfer the cakes to cooling racks and cool for about 5 minutes, then run a knife around the sides of the cakes, unmold them and peel off the paper liners. Invert and cool to room temperature right side up. (The cooled cake layers can be wrapped airtight and stored at room temperature overnight or frozen for up to 2 months.)

For the Filling:

2 large apples, grated
1/2 teaspoon cinnamon
1/2 cup sugar
2 teaspoons lemon juice

Combine all ingredients in saucepan and cook until apples are tender.

For the Icing:
From The Southern Foodways Alliance Community Cookbook

3 cups sugar
3 tablespoons light corn syrup
1 1/2 cups whole milk
1 stick unsalted butter, softened
1 teaspoon pure vanilla extract
1/2 cup heavy cream

In a saucepan, stir 2 1/2 cups of the sugar with the corn syrup and milk. Cook over moderate heat, stirring until the sugar dissolves. Keep warm.
Sprinkle the remaining 1/2 cup of sugar in a deep, heavy saucepan. Cook the sugar over moderate heat, swirling occasionally, until an amber caramel forms. Carefully pour the warm milk mixture over the caramel. Cook over moderately high heat, stirring, until the caramel dissolves. Stop stirring and cook until the caramel registers 235° on a candy thermometer. Remove from the heat. Stir in the butter, vanilla and 1/4 cup of the heavy cream. Strain the caramel into the bowl of a standing mixer. Let cool for 15 minutes.

Beat the caramel at medium speed, gradually adding the remaining 1/4 cup of cream, until creamy, about 15 minutes.


Set 1 cake layer on a plate. Top with apple mixture. Add the top layer and pour icing over the top of the cake, letting it run down the sides. Working quickly, use an offset spatula to spread the icing gently around the cake. Let the cake stand for 2 hours to set the icing before serving.

Thursday, June 10, 2010

Dorie Greenspan's Perfect Party Cake

mmm, cake.

I’m a big believer in baking cakes just because you want to. I made this one because it’s Thursday, and Thursdays definitely need some joy injected into them. What is it with Tuesdays and Thursdays? They are always so dull.

I understand the other side though - the people who only bake cakes for special occasions. I suppose they seem more special that way, if you don’t have them all of the time. Heck, this cake is called the perfect party cake. But cake baking is fun! And delicious! And life can always use a little extra sweetness.

So what about you? Are you a celebration cake kind of person? An any ol’ time you feel like it cake baker? Or do you hate cake and wish to never see one again? (if that’s the case, bake this one asap. Your mind will be blown.) I want to know!
decorating

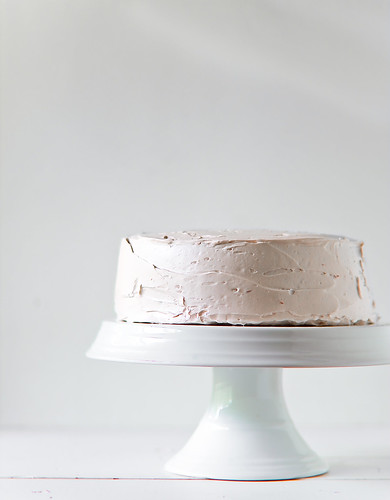
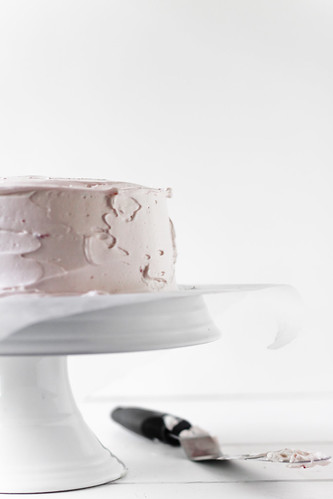
This cake is perfection, Dorie Greenspan never lets me down. I only made a few of changes, I left the vanilla extract out of the frosting, added some cherry juice to dye it pink, I used my homemade cherry jam as filling, and didn’t cover it with coconut.

It’s delightful, not too sweet (I say that alot, I know! I just really like not-so-sweet baked goods.) and both the cake and the buttercream (which is the best buttercream I have ever had in my life) are slightly lemony. And I love lemon. If you happen to not care for lemon, I’m sure you could just leave it out, use vanilla extract instead. Or almond! I bet almond extract would be delicious. Then cover it in almonds! I may have to try that one out...

cake!

Perfect Party Cake
from Baking: From My Home To Yours

For the Cake:

2 1/4 cups cake flour
1 tablespoon baking powder
1/2 teaspoon salt
1 1/4 cups whole milk or buttermilk
4 large egg whites
1 1/2 cups sugar
2 teaspoons grated lemon zest
1 stick (8 tablespoons) unsalted butter, at room temperature
1/2 teaspoon pure lemon extract

For the Buttercream:

1 cup sugar
4 large egg whites
3 sticks (12 ounces) unsalted butter, at room temperature
1/4 cup fresh lemon juice (from 2 large lemons)
1 teaspoon pure vanilla extract

For Finishing:

2/3 cup seedless raspberry preserves, stirred vigorously or warmed gently until spreadable
About 1 1/2 cups sweetened shredded coconut

Getting Ready: Center a rack in the oven to 350 degrees F. Butter two 9-x-2-inch round cake pans and line the bottom of each pan with a round of buttered parchment or wax paper. Put the pans on a baking sheet.

To Make The Cake: Sift together the flour, baking powder and salt.
Whisk together the milk and egg whites in a medium bowl.
Put the sugar and lemon zest in a mixer bowl or another large bowl and rub them together with your fingers until the sugar is moist and fragrant. Add the butter and, working with the paddle or whisk attachment, or with a hand mixer, beat at medium speed for a full 3 minutes, until the butter and sugar are very light. Beat in the extract, then add one third of the flour mixture, still beating on medium speed. Beat in half of the milk-egg mixture, then beat in half of the remaining dry ingredients until incorporated. Add the rest of the milk and eggs, beating until the batter is homogeneous, then add the last of the dry ingredients.
Finally, give the batter a good 2-minute beating to ensure that it is thoroughly mixed and well aerated. Divide the batter between the two pans and smooth the tops with a rubber spatula.

Bake for 30 to 35 minutes, or until the cakes are well risen and springy to the tough – a thin knife inserted into the centers should come out clean. Transfer the cakes to cooling racks and cool for about 5 minutes, then run a knife around the sides of the cakes, unmold them and peel off the paper liners. Invert and cool to room temperature right side up. (The cooled cake layers can be wrapped airtight and stored at room temperature overnight or frozen for up to 2 months.)

To Make the Buttercream: Put the sugar and egg whites in a mixer bowl or other large heatproof bowl, fit the bowl over a pan of simmering water and whisk constantly, keeping the mixture over the heat, until it feels hot to the touch, about 3 minutes. The sugar should be dissolved, and the mixture will look like shiny marshmallow cream. Remove the bowl from the heat.

Working with the whisk attachment or with a hand mixer, beat the meringue on medium speed until it is cool, about 5 minutes. Switch to the paddle attachment if you have one, and add the butter a stick at a time, beating until smooth. Once all the butter is in, beat the buttercream on medium-high speed until it is thick and very smooth, 6 to 10 minutes. During this time, the buttercream may curdle or separate – just keep beating and it will come together again. On medium speed, gradually beat in the lemon juice, waiting until each addition is absorbed before adding more, and then the vanilla. You should have a shiny, smooth, velvety, pristine white buttercream. Press a piece of plastic against the surface of the buttercream and set aside briefly.

To Assemble the Cake: Using a sharp, serrated knife and a gentle sawing motion, slice each layer horizontally in half. Put one layer cut side up on a cardboard cake round or a cake plate protected by strips of wax or parchment paper. Spread it with one third of the preserves. Cover the jam evenly with about one quarter of the buttercream. Top with another layer, spread with preserves and buttercream and then do the same with the third layer (you’ll have used all the jam and have buttercream left over). Place the last layer cut side down on top of the cake and use the remaining buttercream to frost the sides and top. Press the coconut into the frosting, patting it gently all over the sides and top.

Serving: The cake is ready to serve as soon as it is assembled, but it’s best to let it set for a couple of hours in a cool room.
Storing: The cake is best the day it is made, but you can refrigerate it, well covered, for up to 2 days.
Monday, May 10, 2010

Lemon Buttermilk Rhubarb Bundt Cake

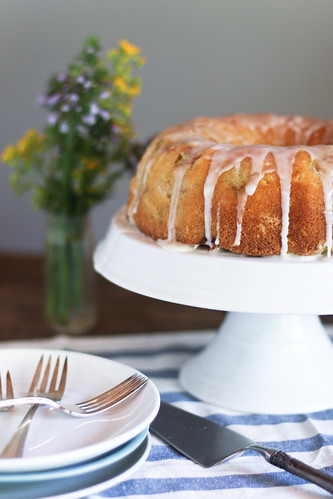
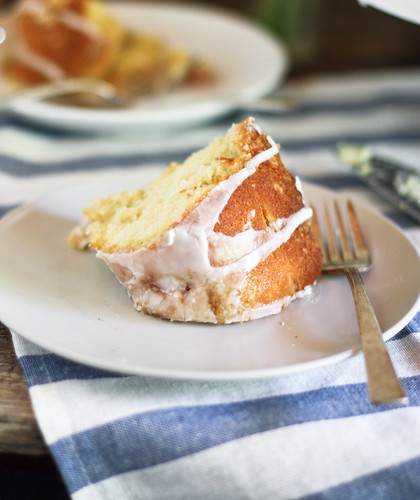
rhubarb lemon buttermilk cake

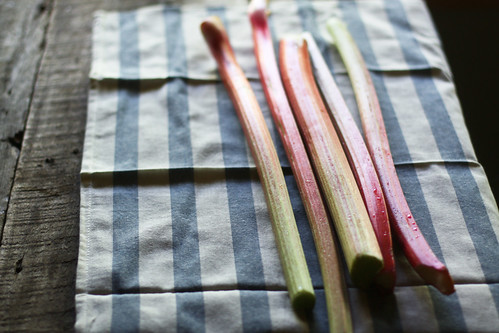
When a friend gives you free, heirloom rhubarb, you get into the kitchen and make something delicious with it as soon as possible. The moment I got it home, I was flipping through my copy of Rustic Fruit Desserts to find the perfect recipe. There were many to choose from, crumbles to pies, but it was this recipe that caught my eye.

rhubarb

This cake, with it’s deep lemon flavor coming from zest, extract and lemon glaze, has pieces of yummy tart rhubarb through out. Strawberry may be rhubarbs perfect mate, but lemon is a close second. I’d never had the two together before, but they work so, so well.

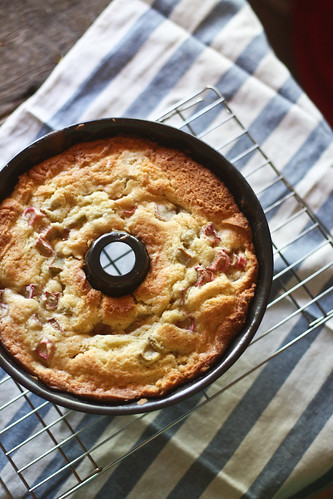
rhubarb lemon buttermilk cake


The cake it’s self is almost too fantastic for words, rich and moist, my new favorite, for sure. It would work wonderfully with whatever fresh fruit you have on hand, as soon as there are fresh blueberries at the farmers market I’m putting them in this batter!

If you have any fresh spring rhubarb in your kitchen, this is a fantastic way to make use of it!

rhubarb lemon buttermilk cake

Lemon Buttermilk Rhubarb Bundt Cake
from Rustic Fruit Desserts

Cake

2 1/2 cups plus 2 tablespoons all purpose flour
1 teaspoons baking powder
1 teaspoon fine sea salt
1 cup unsalted butter
1 3/4 cups granulated sugar
zest of 1 lemon
3 eggs
1/2 teaspoon lemon oil (i used lemon extract)
3/4 cup buttermilk
1 pound rhubarb, trimmed and very thinly sliced (3 cups prepped)

Lemon Glaze

2 cups confectioners sugar, more as needed
Juice of 1 lemon
1 tablespoon nearly melted butter

Preheat oven to 350. Butter a 10-cup bundt pan.

To make the cake, sift the 2 1/2 cups flour, the baking powder and salt together in a bowl. Using a handheld mixer with beaters or a stand mixer with the paddle attachment, cream the butter, sugar and lemon zest together on medium-high speed for 3 to 5 minutes, until light and fluffy. Add the eggs one at a time, scraping down the sides of the bowl after each addition, then stir in the lemon oil. Stir in the flour mixture in three additions alternating with the buttermilk in two additions, beginning and ending with the flour mixture and scraping down the sides of the bowl occasionally. The batter will be very thick.

Toss the rhubarb with the 2 tablespoons of flour and fold half into the batter. Pour the batter into the prepared pan and sprinkle the remaining rhubarb on top.

Bake for 30 minutes, then rotate the pan and cook for an additional 30 minutes, or until the center springs back when lightly touched. Cool the cake in its pan on the wire rack for 30 minutes before inverting and removing the pan.

To make the lemon glaze, whisk the confectioners sugar, lemon juice and butter together. The mixture should be thick. If it’s not, whisk in another tablespoon or two of the sugar. Spread the glaze over the cake as soon as you remove it from the pan.

Friday, December 18, 2009

Chocolate Cake & a Guest Post at The Kitchn.


I have a guest post up on The Kitchn today! Head over there to read all about my latest cake disaster. It was just ridiculous!


Friday, November 06, 2009

happy birthday, honey & jam.


One year ago today, I was sitting at my dining room table with my laptop, a cup of tea, and a piece of toast and it was there I decided to start a blog. You see, I knew only a little bit of about the blogging world, and even less about the food blogging world, but it seemed like fun, an outlet for my passions. I had no idea what I was going to do with it, I didn’t even start with a food blog in mind.


I’ve grown and learned so much through this blog, as a baker and as a photographer. When I started, I’d sort of given up on photography, due to frustrations with my digital camera. I’d always worked with film before, and the transition over to digital wasn’t an easy one for me. I didn’t understand a thing about lighting, and all the buttons on the back of the camera just baffled me. I picked it back up for this blog, and I’ve learned so, so much this past year. I now have a passion for food photography that is sometimes overwhelming, but so much fun!


And of course, I’ve learned so much about baking. Food blogs are such a wealth of information and inspiration. I’ve grown to love the food blogging community, which lends so much support for everyone involved.


What keeps coming to mind is thankfulness - I’m so thankful for this little piece of the internet I call my own, so thankful for all of you that read what I write, look at my photos and leave me the most thoughtful comments. Seriously, y’all bowl me over with your kindness.

Of course, I have to thank my wonderful family, who puts up with all my shenanigans.

To my mother - who supports me no matter what, tolerates my craziness in the kitchen, and laughs with me when things go wrong (which is pretty regularly).

To my father - who can build me absolutely anything I ask him to, and supports me in the most subtle ways.

To my brother - who always keeps me laughing.

And to my sister - my tireless photography assistant and sous chef, I couldn’t do it without you!


I do believe that’s all I have to say, so today, to celebrate, I bring you what I love - a cup of tea, with honey and a slice of cake, with jam, topped off with cute little edible violas. I hope you enjoy!


This is one of my absolute favorite layer cake recipes, and it perfect for cupcakes too. You can fill it with anything, curd, frosting, or my favorite, raspberry jam. And the frosting, it’s so simple, but rich and delicious.


Vanilla Cake
from Southern Living

2 cups sugar
1 cup butter, softened
3 large eggs
1 tsp vanilla extract
1/4 tsp almond extract (I left this out this time around)
3 cups cake flour
1 1/2 tsp baking powder
1/4 tsp salt
1 cup buttermilk (I used whole, I was out of buttermilk.)

Preheat oven to 350.

Beat sugar and butter at medium speed with a heavy-duty electric stand mixer until creamy and fluffy, about 5 minutes.

Add eggs, 1 at a time, beating until yellow disappears after each addition. Beat in vanilla and almond extracts.

Whisk together flour, baking powder and salt in a small bowl; add to sugar mixture alternately with buttermilk, beginning and ending with flour mixture. Beat a medium-low speed just until blended after each addition. (batter will be thick)

Bake for 32-36 minutes, or until a cake tester comes out clean.

Rich Chocolate Frosting

1 cup butter, softened
4-1/2 cups confectioners' sugar
1-1/4 cups baking cocoa
1/2 teaspoon vanilla extract
1/2 cup milk

In a large mixing bowl, cream butter until light and fluffy. Alternate beating in confectioners’ sugar and cocoa, adding milk as needed, until it reaches spreading consistency. Add vanilla.

Monday, September 28, 2009

Chocolate Cinnamon Bundt Cake with Mocha Icing

mums the word.

"Delicious autumn! My very soul is wedded to it, and if I were a bird I would fly about the earth
seeking the successive autumns."
George Eliot

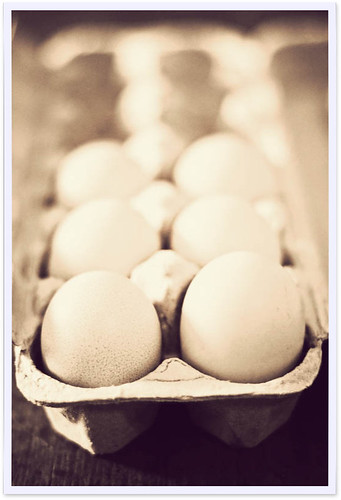
eggs

I can’t even express how much I love fall. I could wax poetic about it all day long. It refreshes me, renews my love for nature, makes me thankful to be alive. It makes getting in the kitchen so much more enjoyable with that cool breeze coming in through the window.

IMG_2043-2

espresso powder

It feels like it’s been ages since I was in my own kitchen, doing what I love the most. Measuring, mixing, photographing. It felt so, so good to at it again. I’d forgotten how much I love the process, scooping flour into the measuring cup, leveling off the top, packing the brown sugar, cracking the eggs. It’s peaceful and therapeutic for me.

Chocolate-Cinnamon Bundt Cake with Mocha Icing

I even love the waiting, the anticipation of having something in the oven. I’m a compulsive checker though, pulling the oven door open every 10 minutes, even though I know I shouldn’t.

cake

Today has been a good day. As I sit here with an empty cake plate beside me, I’m incredibly thankful, for the weather, for my family, for good food.

Chocolate Cinnamon Bundt Cake with Mocha Icing
From Bon Appetit, September 2009

Ingredients

  • 1 cup boiling water
  • 1/2 cup natural unsweetened cocoa powder
  • 4 teaspoons instant espresso powder, divided
  • 2 cups unbleached all purpose flour
  • 2 teaspoons baking powder
  • 2 teaspoons ground cinnamon
  • 1 teaspoon salt
  • 2 1/2 cups (packed) golden brown sugar, divided
  • 1 cup vegetable oil
  • 1 tablespoon vanilla extract
  • 2 large eggs
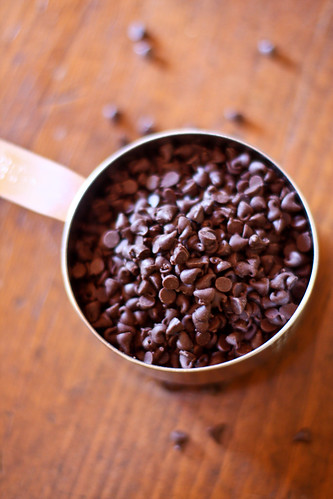
  • 1 1/4 cups mini semisweet chocolate chips, divided
  • 1/4 cup (1/2 stick) unsalted butter, room temperature

Preparation

  • Preheat oven to 350°F. Generously brush 12- to 15-cup nonstick Bundt pan with oil. Whisk 1 cup boiling water, cocoa powder, and 2 teaspoons espresso powder in 2-cup glass measure. Whisk 2 cups flour, baking powder, cinnamon, and salt in medium bowl. Using electric mixer, beat 2 cups brown sugar, 1 cup vegetable oil, and 1 tablespoon vanilla in large bowl to blend. Add eggs; beat to blend. Beat mixture until smooth, about 30 seconds longer. Beat in half of flour mixture, then cocoa mixture. Add remaining flour mixture; beat to blend. Fold in 1 cup chocolate chips. Transfer batter to prepared Bundt pan.
  • Bake cake until tester inserted near center comes out clean, about 50 minutes. Cool the cake 10 minutes. Invert cake onto rack; cool 15 minutes longer.
  • Meanwhile, stir remaining 1/2 cup brown sugar, 2 teaspoons espresso powder, and 2 tablespoons water in small saucepan over medium heat until sugar melts. Remove from heat. Add butter and remaining 1/4 cup chocolate chips; stir until butter and chocolate melt. Cool slightly. Using spoon, drizzle icing over cake. Cool cake completely, slice, and serve.

Thursday, August 13, 2009

Purple (well...brown) Velvet Cake.

birthday girl.

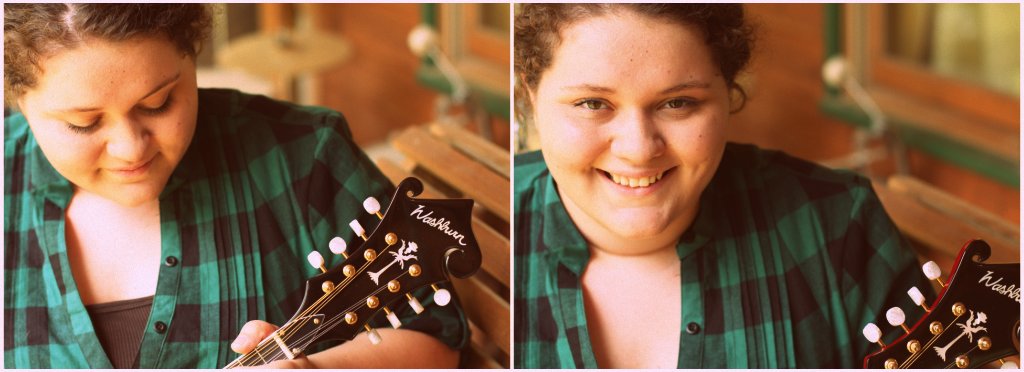
Today is my lovely sisters 15th birthday. I can’t believe she’s driving. It seems like just yesterday we were yelling at each other in the back seat of the car. She’s become this awesome bluegrass loving, mandolin playing, Jesus following young woman. She rocks.

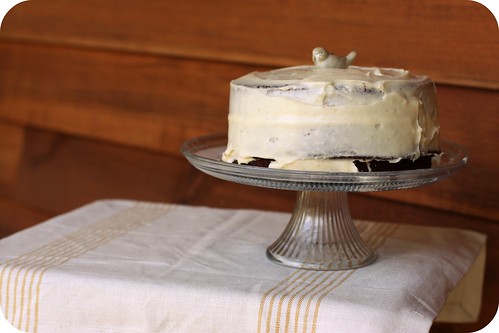
birthday cake

And how else could I celebrate but to make her a cake? She requested her favorite, Red Velvet. Since red velvet is essentially just chocolate cake dyed bright red, I thought it would be more fun to dye it purple. Sadly, it came out more brown, but it’s the thought that counts, right?

3 layers?!

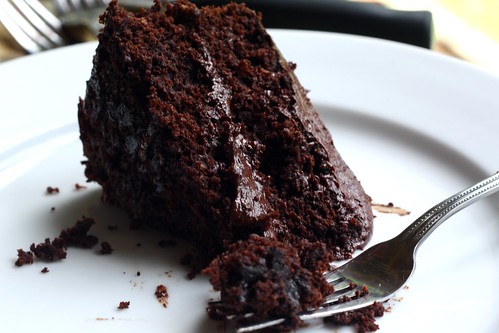
This is definitely the best recipe for red velvet I’ve found, it’s a little more chocolate-y
than most, super moist and slightly tangy. Plus, the cream cheese frosting was delicious, and I don’t even like it normally.

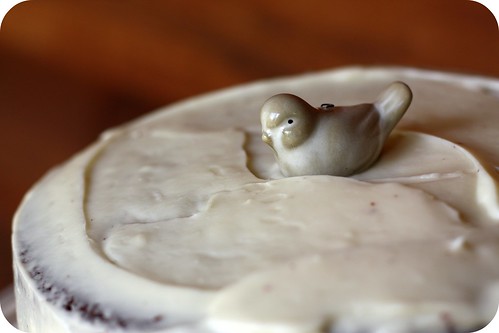
little birdie topper

To top it off I used this little birdie, he was once a christmas ornament. It’s so Sarah.

Happy Birthday baby sister, I hope you liked your cake!

cake
let's pretend I can actually frost cakes! haha.

Red Velvet Cake
Adapted from “The Confetti Cakes Cookbook” by Elisa Strauss via Smitten Kitchen.

Yield: 3 cake layers

1 tablespoon unsalted butter
3 1/2 cups cake flour
1/2 cup unsweetened cocoa (not Dutch process)
1 1/2 teaspoons salt
2 cups canola oil
2 1/4 cups granulated sugar
3 large eggs
6 tablespoons (3 ounces) red food coloring or 1 teaspoon red gel food coloring dissolved in 6 tablespoons of water
1 1/2 teaspoons vanilla
1 1/4 cup buttermilk
2 teaspoons baking soda
2 1/2 teaspoons white vinegar.

1. Preheat oven to 350 degrees. Place teaspoon of butter in each of 3 round 9-inch layer cake pans and place pans in oven for a few minutes until butter melts. Remove pans from oven, brush interior bottom and sides of each with butter and line bottoms with parchment.

2. Whisk cake flour, cocoa and salt in a bowl.

3. Place oil and sugar in bowl of an electric mixer and beat at medium speed until well-blended. Beat in eggs one at a time. With machine on low, very slowly add red food coloring. (Take care: it may splash.) Add vanilla. Add flour mixture alternately with buttermilk in two batches. Scrape down bowl and beat just long enough to combine.

4. Place baking soda in a small dish, stir in vinegar and add to batter with machine running. Beat for 10 seconds.

5. Divide batter among pans, place in oven and bake until a cake tester comes out clean, 40 to 45 minutes. Let cool in pans 20 minutes. Then remove from pans, flip layers over and peel off parchment. Cool completely before frosting.

Cream Cheese Frosting

Makes 6 cups

8 ounces cream cheese, room temperature
1/2 cup (1 stick) butter room temperature
3 cups confectioner’s sugar, sifted
1 teaspoon pure vanilla extract

Place cream cheese and butter in a medium bowl. With a handheld electric mixer, beat until light and fluffy, about 2 minutes. Add sugar and vanilla. Beat, on low speed to combine. If too soft, chill until slightly stiff, about 10 minutes, before using.


Oh, for those interested, I did get a new lens! I upgraded from the 50mm 1.8 to the 50mm 1.4. So far I love it! You can see the shots I've taken so far with it at my flickr.

Thursday, July 16, 2009

The secret ingredient is...

root beer

Root beer!

I really love root beer. I love how the bubbles always go up my nose when I drink it. I love how it seems to taste like summer - all care free and child like. I remember drinking it as a kid, always IBC. I didn’t even know any one else made root beer for the longest time.

root beer cake

But I’d never thought of putting it in a cake before. It’s kind of crazy when your batter fizzes as you stir it. While you don’t really taste the root beer in the cake, you do in the frosting. It’s probably one of the most delicious frostings I’ve ever made. All chocolatey and root beery. And the cake is so, so moist, it’s a super good chocolate cake with a twist - you can’t really identify it.

I think I’m going to have to make a cream soda cake next.


root beer cake

root beer cake

Root Beer Float Cake

From Baked, New Frontiers in Baking

2 cups root beer (don’t use diet)

1 cup dark unsweetened cocoa powder

1/2 cup unsalted butter, cut into 1/2 inch cubes

1 1/4 cup granulated sugar

1/2 cup dark brown sugar

2 cups all-purpose flour

1 1/4 teaspoons baking soda

1 teaspoon salt

2 large eggs

Preheat even to 325 degrees F. Spray the inside of a 10-inch Bundt pan (or 2 round cake pans) with nonstick cooking spray, or butter generously and dust with flour, knocking out the excess.

In a small saucepan, heat the root beer, cocoa powder and butter over medium heat until butter is melted. Add sugars and whisk until dissolved. Remove from heat and let cool.

In a large bowl, whisk together the flour, baking soda and salt.

In a small bowl whisk the eggs until just beaten. Then whisk into the cocoa mixture until combined. Gently fold the flour mixture into the cocoa mixture. The batter will be slightly lumpy. You can give it a quick whisk if you like, but don’t over beat the batter or it could cause the cake to be tough. Don’t worry, the batter is very loose.

Pour the batter into prepared pan and cook for 35-45 minutes (or 25-30 minutes for 2 cake pans), rotating the pan halfway through baking until a sharp knife inserted in the center comes out clean. Transfer to a wire rack to cool completely then loosen edges with a butter knife and turn out onto a cake plate.

Chocolate Root Beer Frosting

2 ounces 60% cocoa, melted

1 stick unsalted butter, softened

1 teaspoon salt (you may want to use less… maybe just 1/2 teaspoon)

1/4 cup root beer

2/3 cup unsweetened cocoa powder

2 1/2 cups powdered sugar

In the bowl of a stand mixer, or using an electric hand mixer, beat softened butter and cocoa powder. Once combined add the melted chocolate, salt, powdered sugar and root beer. Beat together until smooth. Spread on top of cooled cake. Slice and serve with vanilla ice cream.

Tuesday, June 16, 2009

Lime Coconut Cake and a Giveaway!

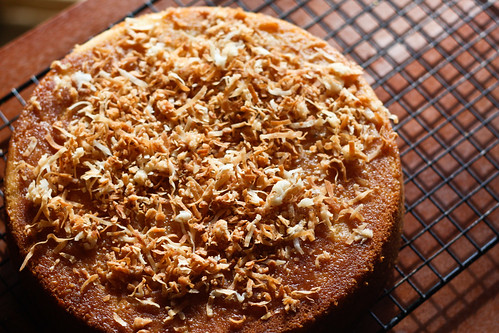
lime coconut cake

My life has gotten crazy busy. Between my job at the farmers market, baking for the farmers market, the garden, the chickens, landscaping for my parent’s business, I haven’t had any time to bake what I wanted.

Which totally stinks because I have SO much stuff on my to-bake list. I’ve had to start scheduling my baking on a calendar. It’s crazy.

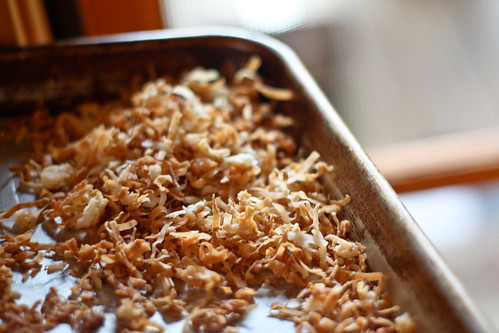
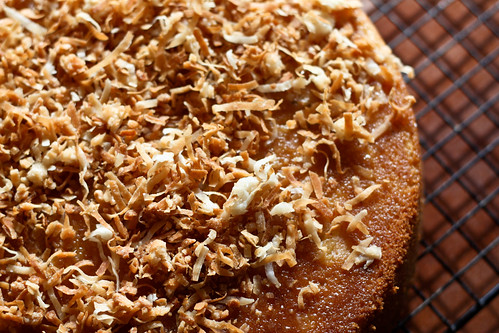
toasty coconut

But I do enjoy the being busy, I absolutely love my new job, it’s like a dream. The people are so sweet and it’s so great to have that sense of community.

lime coconut cake

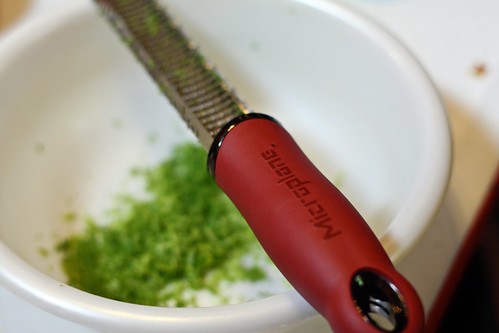
So I’m happy, just busy. Today when I got home from work, I was sweaty, tired and unmotivated, but I wanted, needed to bake. I looked through the recipes I had printed off and bookmarked to see what would be the easiest and tastiest. I decided on this key lime coconut cake from smitten kitchen. I had all the ingredients, plus I really wanted to use my new microplane grater. Sad, but true. I LOVE this thing. It’s amazing. It zests so quickly and so completely. I’ll never go back to another grater/zester.

microplane zester

I love it so much I want to give you one! I’m giving away 1 microplane zester to a lucky commenter that I’ll choose randomly through random.org.

What to do to enter:
Enter once by leaving a comment on this post and a way to contact you if you don't have a blog.
Enter a second time by twittering about the giveaway to @honeyandjam AND leaving a ANOTHER comment on this post.
Enter another time by posting about this giveaway on your blog AND leaving ANOTHER comment on this post.

No entires after 10 pm EST this Saturday, June 20th.

I’ll select one winner through random.org next Sunday.

Anyway, back to the cake. It was DELICIOUS. Oh my word. One of the best things I’ve made in a while. So moist and fluffy and flavorful. You should definitely make it. And soon.

lime coconut cake

Key Lime Coconut Cake
Gourmet, March 2009 via Smitten Kitchen

I didn’t have key limes, so I used regular limes and they worked perfectly.
Serves 8.

1 cup sweetened flaked coconut
1 stick unsalted butter, softened
1 1/4 cups granulated sugar
1 tablespoon grated Key lime zest
2 large eggs
1 3/4 cups self-rising flour (or just add 1 teaspoon baking powder and 1/2 teaspoon salt to all purpose.)
3/4 cup whole milk
1/4 cup fresh Key lime juice, divided
1 cup confectioners sugar
1 tablespoon rum (optional)

Preheat oven to 350°F with rack in middle. Generously butter an 8- by 8-inch square or 9- by 2-inch round cake pan and line bottom with a round of parchment paper.

Toast coconut in a small baking pan in oven, stirring once or twice, until golden, 8 to 12 minutes. Cool. Leave oven on.

Beat together butter, granulated sugar, and zest with an electric mixer until fluffy. Beat in eggs one at a time. Stir together flour and 1/2 cup coconut (reserve remainder for topping). Stir together milk and 2 tablespoons lime juice. At low speed, mix flour and milk mixtures into egg mixture alternately in batches, beginning and ending with flour.

Spoon batter into pan and smooth top. Bake until golden and a wooden pick inserted into center comes out clean, 40 to 45 minutes. Cool to warm, then turn out of pan and discard parchment.

Whisk together confectioners sugar, remaining 2 tablespoons lime juice, and rum (if using, if not use milk) and pour over cake. Sprinkle with remaining coconut.

Thursday, June 04, 2009

Coffee Cake and a lesson in Perseverance.

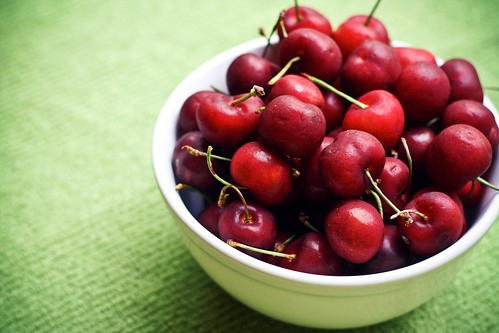
cherries

I’m just going to start this off by saying while this coffee cake isn’t bad, it’s not the best I’ve ever tasted.

That’s kind of how my day has gone. Not the worst, but not the best either. Could be better. I seem to be in a bit of a baking and photography slump lately. I haven’t made anything that has come out super amazing nor have I taken any pictures that I’ve really loved. I think we all go through periods like this, it’s just annoying when you’re in the middle of it.

cherry coffee cake

I try to be honest on this blog, and though I may seem to be a bit of a downer in posts like these, I swear I’m not! I’m a super happy person, even at times like this. If anything, it motivates me to do better, try again. I re-shot the photos for this post 3 times! And while I’m still not thrilled with them, I liked them a little more each time.

Same with the coffee cake, I’m sure I’ll try again soon, I’m thinking of using brown sugar instead of white, a different pan and changing up the streusel a bit (the cake seemed to eat the streusel, there wasn’t much left on the top when it finished baking!)


coffee cake

Perseverance is key in both baking and photography, or at least it seems that way to me. It took me a long time to realize that, but I’m glad I finally did.

Cherry Coffee Cake
from The Martha Stewart Baking Handbook
- 1 stick (1/2 cup) unsalted butter, room temperature, plus more for pan

- 2 cups all-purpose flour

- 1 teaspoon baking powder

- 1 teaspoon baking soda

- 1 teaspoon salt

- 1 cup sugar

- 2 large eggs

- 1 teaspoon pure vanilla extract

- 1 cup sour cream

- 1 cup frozen cherries, thawed and drained well

Streusel:

- ½ cup plus 1 tablespoon all-purpose flour

- 3 tablespoons packed light-brown sugar

- Generous ½ teaspoon ground cinnamon

- ¼ teaspoon kosher salt

- 4 tablespoons unsalted butter, room temperature

Milk glaze:

- 1 cup powdered sugar, sifted

- 2 tablespoons milk

1. Preheat oven to 350 degrees. Butter a 9-inch tube pan and set aside. (Both regular and removable-bottom pans can be used.) In a medium bowl, sift together flour, baking powder, soda and salt; set aside.

2. In the bowl of an electric mixer fitted with a paddle attachment, beat butter, sugar, eggs and vanilla on medium speed until light and fluffy, about 2 to 3 minutes. Add flour mixture in three parts, alternating with sour cream and beginning and ending with flour. Beat until just combined, scraping down the sides of the bowl as needed.

3. Spoon about half of the batter into the prepared pan. Arrange cherries in a single layer; avoid placing any cherries against the pan's edge, as they may stick or burn if not fully encased in batter. Top with remaining batter, making sure it is evenly distributed, and smooth with an offset spatula.

4. Make the streusel by combining flour, sugar, cinnamon and salt. Cut in butter with a pastry blender or fork until large, moist clumps form. Sprinkle evenly over top of cake.

5. Bake until cake is golden brown and springs back when touched, 40 to 45 minutes. Transfer pan to a wire rack set over a baking sheet and let cake cool 10 to 15 minutes. Invert cake onto rack and re-invert so streusel side is up; cool completely. Combine powdered sugar and milk, and spoon glaze over cake, letting it drip down sides. Let cake sit until glaze is set, about 5 minutes, before serving. The cake can be kept at room temperature, wrapped well in plastic, for up to 4 days.
Monday, April 27, 2009

my first daring bakers challenge - cheesecake!

daring bakers cheesecake

I'm not good at making food pretty. Actually, I’m not all that interested in making food pretty. I understand why people do it, but I just don't care enough. I'm never going to be one of those people who spends hours draping a cake with fondant. I love the idea of it, but it's soon to be devoured! I want the food to taste good, and at the end of the day, that's what matters, right? Plus, most food is pretty on it's own, I think.

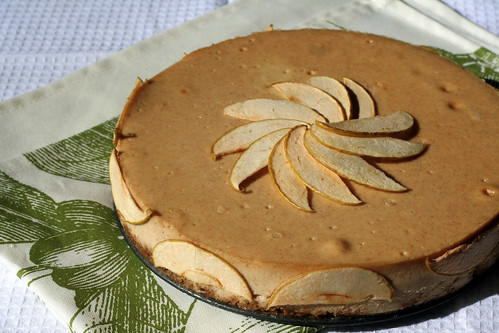
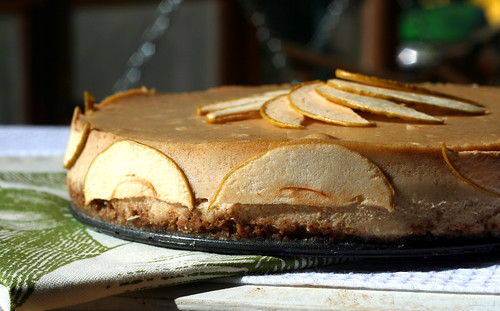
Well, for this months Daring Bakers, my first ever challenge, I decided to give it a go The recipe was cheesecake, I LOVE cheesecake, and think it's pretty great on it's own, but this time I actually put in some effort and tried to decorate it.

daring bakers cheescake

We were given a very basic cheesecake recipe and asked to jazz it up a bit. There is this recipe in Baking From my Home to Yours by Dorie Greenspan I’d been wanting to try for a while now, but just hadn’t gotten around to it, so I decided to combine the recipes. I used the gingersnap crust, apple cider, cinnamon and brown sugar from that recipe and added them to the recipe given.
daring bakers cheescake

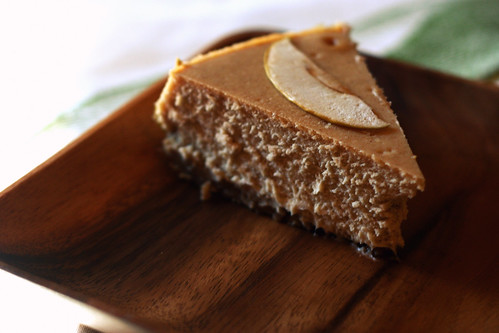
It turned out GREAT. The taste was awesome. My only problem was it had a soggy crust - I’d never done the water bath thing before and I didn’t realize you needed to wrap the bottom of your spring form pan with aluminum foil, I’ll be sure to do that next time.

When it came to decorating, I drew a complete blank. How do you decorate a cheesecake that isn’t fruity or carmel-y or chocolate-y? I couldn’t just throw some berries on top and call it a day.

apples

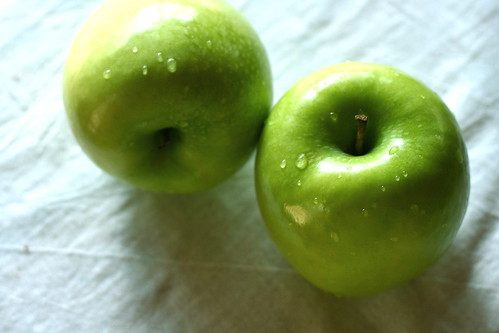
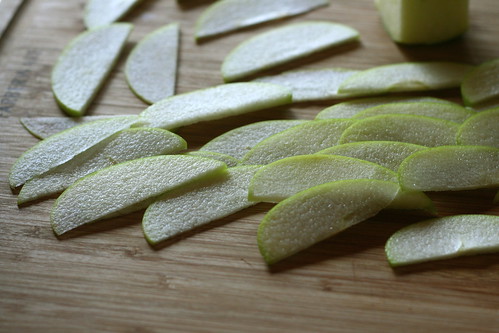
So I asked on the daring bakers forum and someone mentioned drying some apples in the oven. It was the perfect idea. Sure, it still looks a little “rustic”, but I like it. Plus, the apples tasted really good with the cheesecake, the crunch really added something.

apples

I’m really glad I joined daring bakers, it’s been a ton of fun, and I’ll definitely be making this recipe again.

The April 2009 challenge is hosted by Jenny from Jenny Bakes. She has chosen Abbey's Infamous Cheesecake as the challenge.

Here’s the recipe (with my modifications in ( ))


Abbey's Infamous Cheesecake (or Cinnamon-Apple Cider Cheesecake!):

crust:
2 cups / 180 g graham cracker crumbs (ginger snaps)
1 stick / 4 oz butter, melted (1/2 stick)
2 tbsp. / 24 g sugar (light brown sugar)
1 tsp. vanilla extract (1/2 teaspoon ground cinnamon)

cheesecake:
3 sticks of cream cheese, 8 oz each, room temperature
1 cup / 210 g sugar (1/2 cup white sugar 1/2 cup brown sugar)
3 large eggs
1 cup / 8 oz heavy cream
1 tbsp. lemon juice (3 tbsp. apple cider)
1 tbsp. vanilla extract (2 tsp. vanilla extract)
1 tbsp liqueur, optional (2 tsp ground cinnamon)

DIRECTIONS:
1. Preheat oven to 350 degrees F . Begin to boil a large pot of water for the water bath.

2. Mix together the crust ingredients and press into your preferred pan. You can press the crust just into the bottom, or up the sides of the pan too - baker's choice. Set crust aside.

3. Combine cream cheese and sugar in the bowl of a stand-mixer (or in a large bowl if using a hand-mixer) and cream together until smooth. Add eggs, one at a time, fully incorporating each before adding the next. Make sure to scrape down the bowl in between each egg. Add heavy cream, vanilla, lemon juice, and alcohol and blend until smooth and creamy.

4. Pour batter into prepared crust and tap the pan on the counter a few times to bring all air bubbles to the surface. Place pan into a larger pan and pour boiling water into the larger pan until halfway up the side of the cheesecake pan. If cheesecake pan is not airtight, cover bottom securely with foil before adding water.

5. Bake 45 to 55 minutes, until it is almost done - this can be hard to judge, but you're looking for the cake to hold together, but still have a lot of jiggle to it in the center. You don't want it to be completely firm at this stage. Close the oven door, turn the heat off, and let rest in the cooling oven for one hour. This lets the cake finish cooking and cool down gently enough so that it won't crack on the top. After one hour, remove cheesecake from oven and lift carefully out of water bath. Let it finish cooling on the counter, and then cover and put in the fridge to chill. Once fully chilled, it is ready to serve.

P.S. Don't forget about my giveaway.