Showing posts with label savory. Show all posts

Wednesday, January 15, 2014

winter & black pepper buttermilk biscuits.

Untitled

January 12th.

aIMG_3037 copy

Untitled

Untitled
It seems to me that winter gives you the space to be melancholy. More than any other season. Maybe it's all the darkness, these short days. The sadness moves in and sits under the surface, underneath those bare branches. I think it also brings a certain kind of mindfulness. It's easy to find beauty in other seasons. Winter forces you to pay attention. To look for good things. Firewood, all piled up. Smoke scented air. Walks in the chill. These two - the sadness and the mindfulness, they seem to temper each other.

It's a season of baking, too. That pull to be in the kitchen, the warmest part of the house. It has me baking a lot of biscuits. Biscuit making is all about technique. Grating your butter is the easiest way to make sure it stays cold. I like it a lot better than cutting it in with a knife and fork. I've learned to knead the dough a few more times that I think I should - I was scared of tough biscuits, but you need to work the gluten a bit so they hold together well, and the folding gives you the layers everyone wants in a biscuit. Be sure to bake until your tops are well golden. Eat em' warm, and enjoy some of that winter beauty.

Black Pepper Buttermilk Biscuits
makes 12

3 cups all purpose flour, (white lily if you can get it.)
1 tablespoon baking powder
1 teaspoon salt
1 teaspoon freshly ground black pepper
1/2 cup cold salted butter
1 1/4 cup buttermilk

Preheat oven to 400.

Grate butter into a small bowl with large side of a cheese grater. Stick in the freezer.

In a large bowl, whisk together flour, baking powder, salt and pepper.

Add in butter and cut it in with a fork. Pour in buttermilk and stir until dough comes together in a shaggy dough. Knead a 5-7 times in the bowl, then turn out on a floured work surface. Pat dough down to 1/4 inch thick, then fold over and pat down again. Fold over once again, then cut out rounds using a biscuit cutter or floured glass.

Place biscuits side by side in a cast iron skillet. Top with more black pepper. Bake for 15-18 minutes, or until golden brown.

Thursday, April 18, 2013

Dandelion Green & Asparagus Tart, filled with disaster.

IMG_8761

And then I dropped the tart on the floor.

And I laughed, because really, what else can you do?

But let me back up.

I’m a morning person. I can see that look you're giving me right now. A morning person? And you don’t even drink coffee? Yup. I’m that annoying person who is stupidly cheerful first thing. I love the early morning light and the birds chirping and dewy grass and a cuppa tea.

This morning, I was not that person. I was cranky as all get out. There were dishes piled up in my sink, ones I needed to wash before I could get to work. I couldn’t find the bottom of my tart pan. The one I’m always losing, because some people (me), should not be allowed to buy things with multiple parts, because they will lose them. I get down on my knees, body half way into the dark cabinet, rooting around for said tart pan, when the dogs start barking, scaring the wits out of me, so I bang my head on the top of the cabinet. I found the pan, though!

Then my stove top won’t light. There will be no sautéing of the onions. Okay, I’ll microwave them to soften em up a bit. No big. My crust looks weird. I think I pre-baked it too long. Am I out of milk? I should plan better.

IMG_8650

I finally get it in the oven. I check on it and see it’s leaking. I go to yank it out and the rack moves, sending it careening towards the back of the oven. I let out a “NOO!!!”, and grab it with my bare hands. I hop around, hand in the air, doing a “it hurts!” dance. I get it back in, on a cookie sheet this time.

My kitchen starts smelling like overcooked egg, thanks to the bit of filling the hit my oven  floor. I gag a bit. Can we all agree that’s one of the worst smells ever?

IMG_8827

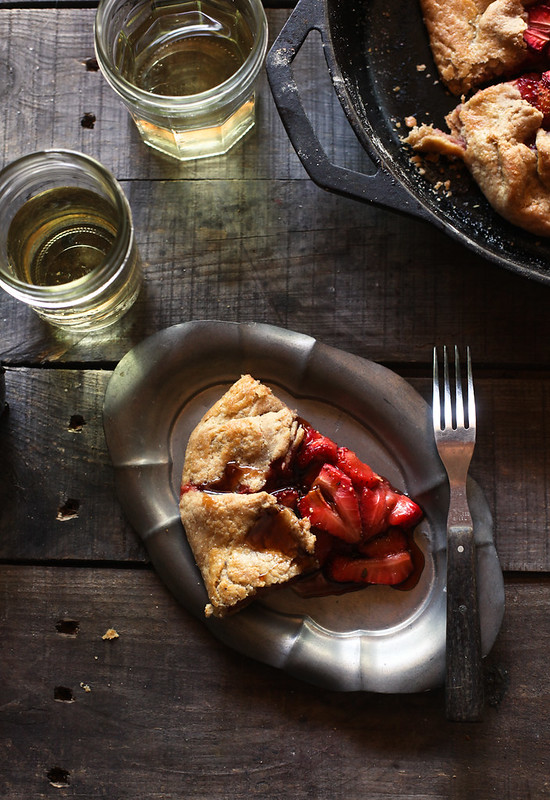
It comes out and it looks beautiful. I run it down to my little table by the window, nearly falling down the stairs on the way, to take photos. My camera dies. I put my battery on to charge and take the tart back upstairs, cut out a piece to try, and then drop the thing on the floor.

Asparagus everywhere. A cute little puppy licking the floor, happy as a clam to clean up 10 bucks worth of cheese for me.

And I laugh. Because seriously?! 

I occasionally get emails saying "your life looks so lovely and perfect!".  It's not all wildflowers in mason jars and farm fresh eggs around here. Some days look like this. Imperfect, frustrating, and also kind of hilarious.

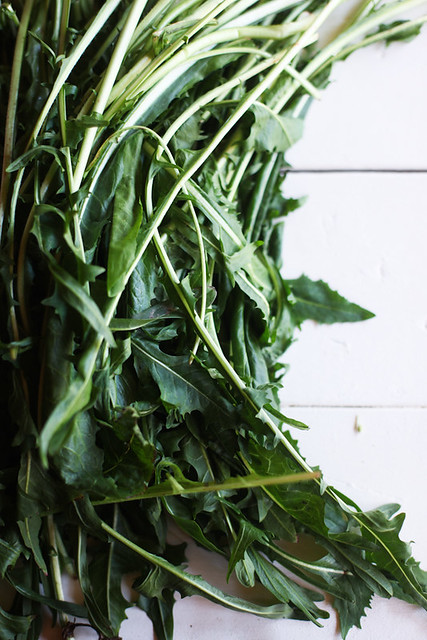
(The tart was delicious. I’d totally be eating another piece right now if it weren’t for the whole floor thing. I'd never had dandelion greens before, I bought them because my new philosophy is this: “if you see something in the produce section you’ve never tried, buy it!”, and turns out really really like them. They’re kinda bitter and that’s my jam. My crust sucked, though, so I won’t be providing the recipe I used here. Just use your favorite savory tart dough! I obviously didn’t go the sauteeing of the onions, garlic, greens and asparagus way, but I suggest you do.)


photo
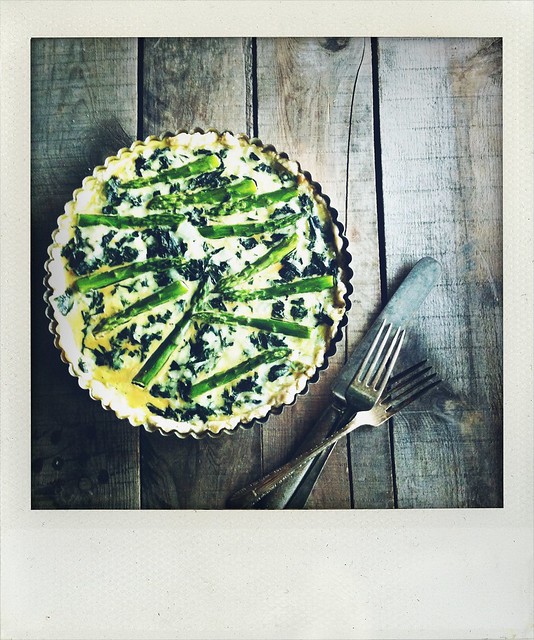
(Sorry about the iphone photo.)

Dandelion Green & Asparagus Tart
Slightly adapted from The New York Times

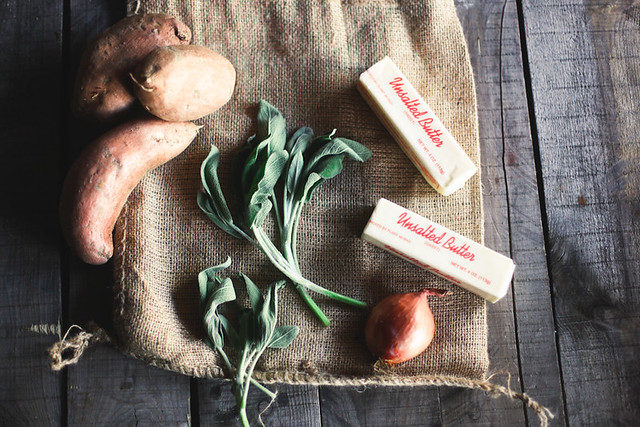
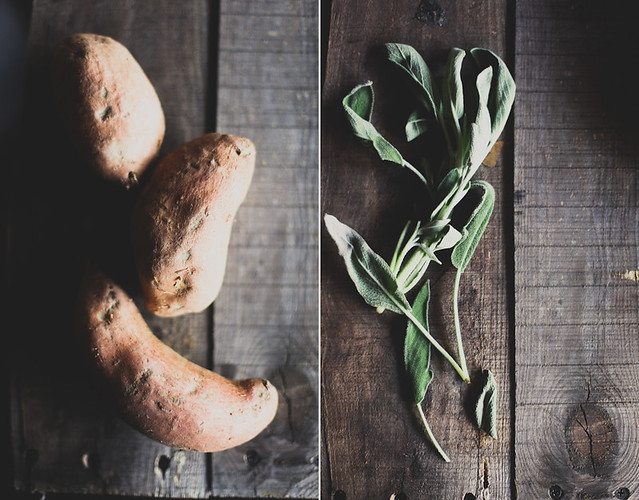
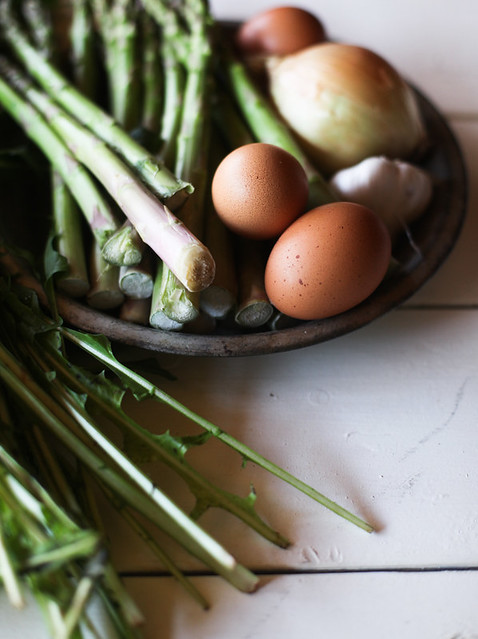
1 generous bunch dandelion greens, about 12 ounces
Salt to taste
2 tablespoons extra virgin olive oil
1 small onion, chopped
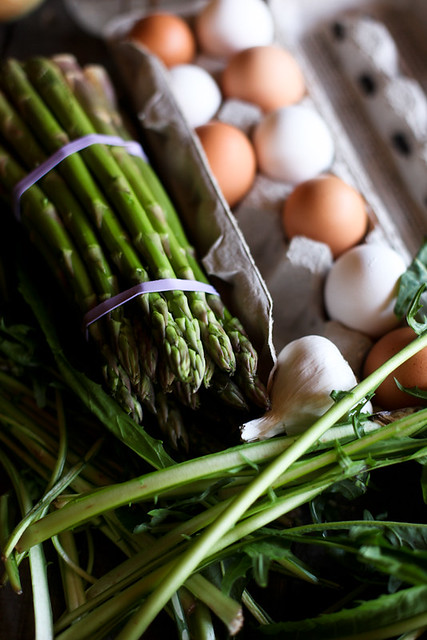
1 bunch of asparagus
1 or 2 garlic cloves (to taste), green shoots removed, minced
4 large or extra large eggs
3/4 cup low-fat milk
Freshly ground pepper
3/4 cup Gruyère cheese, grated (3 ounces)

1 tart crust

Cut the tough stems from the dandelion greens, about 1 inch from the bottom, and wash in two changes of water. Bring a large pot of water to a boil, and fill a bowl with ice water. When the water comes to a boil, salt generously and add the dandelion greens. Blanch four minutes and transfer to the ice water. Drain, squeeze out excess water and chop.

Preheat the oven to 375 degrees. Heat the olive oil in a large nonstick skillet over medium heat, and add the onion. Cook, stirring, until tender, about five minutes, and add a pinch of salt and the asparagus. Cook, stirring, for seven or eight minutes, until the asparagus have softened and the onions are golden. Add the garlic and cook for another minute, then stir in the dandelion greens. Stir together for a minute, and remove from the heat. Season to taste with salt and pepper.

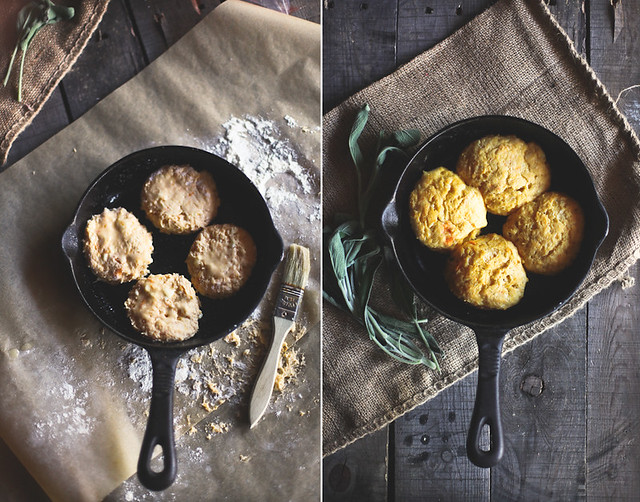
Beat the eggs in a large bowl. Brush the bottom of the pastry shell, and place in the preheated oven for five minutes. Remove from the oven. Whisk the milk into the eggs, add 1/2 teaspoon salt, freshly ground pepper to taste and stir in the cooked vegetables and cheese. Turn into the crust. Bake 35 to 40 minutes, until set and the top is lightly browned. Remove from the heat and allow to sit for 15 minutes before serving. Serve hot or warm.


PS, a HUGE thank you for all the kind words of congratulations on my last post. Y'all are the best! In other exciting news, h&j was nominated as one of the "best baking and desserts blogs" over at the Saveur Food Blog Awards! How cool is that? I'm in such great company and it's such an honor. You can vote for your faves today and tomorrow!

Monday, November 19, 2012

Roasted Kabocha Squash Soup

sage

Confession: I'm a thanksgiving traditionalist.  I'm happy to try new recipes all year long, but when it comes to that Thursday in November, I want nothing more than turkey, cornbread & biscuit dressing, green bean casserole, sweet potatoes topped with marshmallows, and cranberry sauce out of a can.

kabocha squash

I love thanksgiving to taste like home. It might be my favorite thing about the holiday, actually. The ritual of same. I love making the same pie, the one I know my dad loves, I love the familiar taste of each dish. While I know it's far from the most important thing about the day - it's a part that makes me happy.

kabocha squash

This soup? Most definitely won't be on my thanksgiving table. But it's perfect for these chilly days just before.

Untitled

I originally picked up a kabocha squash at the market because I loved the color, dark green with splotches of orange, but now is my new favorite thing. It's sweet and creamy, and wonderful roasted. I had some sad-looking sage hanging around at the back of fridge that needed to be used, so I added it in and I love how the flavors combine.

kabocha squash

kabocha squash

What about you? Thanksgiving traditionalist or are you all about trying new methods & flavors?

roasted kabocha squash soup

Roasted Kabocha Squash Soup
from epicurious

1 (4-lb) kabocha squash halved and seeded

1 cup vegetable oil

20 whole fresh sage leaves plus 1 1/2 teaspoons chopped fresh sage
 
1/4 lb sliced pancetta coarsely chopped 

1 tablespoon olive oil 

1 large onion chopped
 
2 garlic cloves minced
 
3 1/2 cups chicken broth
 
3 1/2 cups water
 
1 tablespoon red-wine vinegar


 Roast squash:


Preheat oven to 400°F.
 Roast squash, cut sides down, in an oiled roasting pan in middle of oven until tender, about 1 hour. When cool enough to handle, scrape flesh from skin.


Fry sage leaves while squash roasts:


Heat vegetable oil in a deep small saucepan until it registers 365°F on a deep-fat thermometer. Fry sage leaves in 3 batches until crisp, 3 to 5 seconds. Transfer leaves with a slotted spoon to paper towels to drain.


Cook pancetta and make soup:


Cook pancetta in a 4-quart heavy pot over moderate heat, stirring, until browned. Transfer pancetta with slotted spoon to paper towels to drain.

 Add olive oil to pancetta fat remaining in pot, then cook onion, stirring, until softened.

Stir in garlic and chopped sage and cook, stirring, until fragrant, about 1 minute. Add squash, broth, and water and simmer 20 minutes to blend flavors.


Purée soup in batches in a blender, transferring to a bowl. (Use caution when blending hot liquids.) Return soup to pot and reheat. If necessary, thin to desired consistency with water.

Stir in vinegar and salt and pepper to taste.

Serve sprinkled with pancetta and fried sage leaves.

Monday, June 04, 2012

Butter Roasted Carrots with Lemon Thyme

carrots

A week or so ago, there was a raging thunderstorm and the skies were a deep shade of grey. I love spring & summer thunderstorms. The way the rain drops sound on my tin roof, how the thunder shakes the house, how the air smells. Most of all, I love the light.

IMG_9778

That day, I happened to have a bunch of fresh carrots in my fridge. I spent a good hour next to my window, taking pictures of them. That kind of light is inspiring. The patter of the rain & the click of my camera was cathartic.


carrots3

As was the sweet & savory scent of butter, thyme and carrot filling my kitchen afterwards.

carrots1 

I thought I'd share with you my favorite way to eat carrots, roasted in a bit of butter. It's just about the most simple preparation you'll come across. You can add any herb you'd like, I used a few sprigs of lemon thyme from my herb garden. Add a some grated fresh ginger if you'd like a bit of sweet spice.


IMG_0367-2 

Butter Roasted Carrots with Lemon Thyme

1 bunch carrots, chopped or left whole
1 tablespoon butter, melted
1 teaspoon olive oil
1/4 teaspoon kosher salt
1/4 teaspoon fresh black pepper
5 or so sprigs of thyme

Preheat oven to 425.
Combine ingredients on a baking sheet. Bake for 15 minutes if chopped, 30 if whole.

Sunday, May 06, 2012

Honey Balsamic Strawberry Galette

IMG_8681-2

Hello from the month of May!

It seems I blinked and April had come and gone. When I looked up, May was here, and with it came open windows, bright green leaves on all of the trees, honeysuckle scented air, baby sheep & cows in all the pastures, and strawberries in my garden.

11111-2

I love strawberries because they seem to usher in the warmer seasons. The actual first taste of the bounty to come. There’s just something so good about that. It makes me happy.

11112-2

The recipe I’m sharing with you today is definitely a grown up dessert.  It’s a little something different than your run of the mill sweet strawberry pie. I macerated strawberries in a balsamic and honey mix, baked it up in a whole wheat crust & topped it off with some freshly ground pepper. It’s hearty, a little bit tart, and really tasty.

11113-3


IMG_8795

Honey Balsamic Strawberry Galette

For the crust:
(adapted from martha stewart)
makes 2

    2 1/2 cups white whole wheat flour or whole wheat pastry flour
    1/2 teaspoon salt
1/2 freshly ground pepper
    2 sticks (1 cup) unsalted butter, cold, cut into small
        1/4 cup ice water, plus more if needed

For the filling:

1 pint fresh strawberries
2 tablespoons balsamic vinegar
4 tablespoons honey


1 teaspoon flour
1 teaspoon sugar
1 teaspoon almond flour
(this part is optional, but it helps to soak up excess juices)

1 egg, beaten

    In the bowl of a food processor, combine flour, salt and pepper; pulse to combine. Add butter, and pulse until mixture resembles coarse crumbs with some larger pieces remaining, about 10 seconds. (To mix by hand, combine dry ingredients in a large mixing bowl, then cut in butter with a pastry blender.)

    With machine running, add ice water through feed tube in a slow, steady stream, just until dough holds together without being wet or sticky. Do not process more than 30 seconds. Test by squeezing a small amount of dough together; if it is still too crumbly, add a bit more water, 1 tablespoon at a time.

    Turn out dough onto a clean work surface. Divide in half, and place each half on a piece of plastic wrap. Shape into flattened disks. Wrap in plastic, and refrigerate at least 1 hour or overnight.

Slice strawberries, toss in bowl with balsamic vinegar & honey. Let sit for 1 hour or more, up to 24 hours.

Preheat oven to 375. Roll out dough to 1/8 inch thick. Lay crust flat on cookie sheet or cast iron pan. Strain strawberries, reserving the liquid.

Combine the flour, sugar and almond flour, and sprinkle around the center of the dough, leaving 2 inch border.

Mound strawberries on top of the dough, then fold dough over, overlapping where necessary. Brush dough with egg. Bake until golden brown & bubbling, about 45 minutes.

Meanwhile, place remaining balsamic & honey in a small saucepan, adding 2 more tablespoons of balsamic and 3 more tablespoons of honey, boil until thickened.

Remove galette from oven & top with freshly ground pepper. Serve warm with balsamic honey sauce.


PS, check out my feature on Oh Joy!

Tuesday, January 03, 2012

Sweet Potato Biscuits with Caramelized Shallot & Sage Butter (Plus a giveaway!)

IMG_0378

I’m snowed in today. I’ve always loved snow days. The world slows down a bit, gets quiet.  Snow days always mean baking for me.

A few days ago, I mentioned on twitter I wasn’t sure what to bake next. If you’re ever out of ideas, turn to twitter, seriously, crowd-sourcing is the way to go. I got lots of suggestions, but sweet potato biscuits grabbed my attention (thanks, tim!).

biscuits3-2

I love sweet potatoes - probably more than your average person. I have them several times a week, in every different form, baked, roasted, as fries, I should have probably turned orange by now, but I’d never tried sweet potato biscuits before.

sweet2

The biscuits are very mellow in flavor, and just a touch sweet. They go really well with the savory & flavorful caramelized shallot and sage butter I threw together.

What also would go great with these biscuits are the goodies in Eat Boutique's breakfast box. A couple of months ago, Maggie, the owner, asked me if I’d like to host a giveaway and I jumped at the opportunity to share this business with you. I’ve been a huge fan of Eat Boutique since it’s creation and I’ve loved watching it grow.

Eat Boutique is an online marketplace for handmade, artisanal foods. They create well thought-out seasonal gift boxes, full of handpicked goods. The one you can win today is the breakfast box, which will contain coffee, maple syrup (so good on biscuits!), and lots of other delicious things. (Yours may vary just a little from the one listed on the site.)


How to enter:

It’s simple. Just leave a comment here saying you'd like to be entered (I'll only count the ones that mention they'd like to be entered, since this is a US only giveaway. If you're not from the US but you'd like to comment anyway, feel free. ;).

Enter a second time by becoming a fan of Eat Boutique on Facebook, come back here and leave another comment saying you’ve done so.


Enter a third time by tweeting about this giveaway (be sure to include @honeyandjam and @eatboutique) and leave another comment saying you’ve done so.

No entries after 11 pm EST this Sunday, January 8th. US residents only. Winner will be picked at random and announced the 9th.

sweet1

Sweet Potato Biscuits
From Martha Stewart
Makes 8

Ingredients
    1 3/4 cups all-purpose flour, plus more for kneading and shaping
    2 tablespoons light-brown sugar
    2 1/2 teaspoons baking powder
    1 teaspoon salt
    1/2 teaspoon baking soda
    6 tablespoons chilled unsalted butter, cut into pieces, plus 1/2 tablespoon melted butter and more for pan
    3/4 cup Sweet-Potato Puree, chilled
    1/3 cup buttermilk

Directions
Make the dough: In a large bowl, whisk together flour, sugar, baking powder, salt, and baking soda. With a pastry blender or two knives, cut in butter until mixture resembles coarse meal, with some pea-sized lumps of butter remaining. In a small bowl, whisk together sweet potato puree and buttermilk; stir quickly into flour mixture until combined (do not overmix).

Shape the biscuits: Turn out dough onto a lightly floured surface, and knead very gently until dough comes together but is still slightly lumpy, five or six times. (If dough is too sticky, work in up to 1/4 cup additional flour.) Shape into a disk, and pat to an even 1-inch thickness. With a floured 2-inch biscuit cutter, cut out biscuits as close together as possible. Gather together scraps, and repeat to cut out more biscuits (do not reuse scraps more than once).

     Bake the biscuits: Preheat oven to 425 degrees, with rack on lower shelf. Butter an 8-inch cake pan. Arrange biscuits snugly in pan (to help them stay upright). Brush with melted butter. Bake until golden, rotating once, 20 to 24 minutes.

Caramelized Shallot & Sage Butter

1/2 cup (one stick) unsalted butter, room tempature
1 shallot, finely minced
2 tablespoons sage, finely chopped
1 teaspoon sea salt
1 tablespoon olive oil

Heat 1 tablespoon of olive oil in a small saucepan, over low heat. Add the shallot and cook until brown & soft. Let it cool completely.

In the bowl of an electric mixer, or by hand, beat the butter, shallot, sage and salt until combined.

You can place this mixture in a bowl, or scrape the butter onto a piece of plastic wrap, mold into a log shape and refrigerate.

The giveaway is now closed. Jacqui has won! Congrats Jacqui, your package is on its way!

Tuesday, September 06, 2011

Roasted Tomato Soup

tomato soup!

It seems I’m a wee bit smitten with tomatoes. For years, I couldn’t stand them. I’d pick them out of salads, pull them off pizzas, avoid them at all costs. Then one day I gave them another try and I was totally in love. I’m still kind of picky - I don’t like really gushy ones, and I prefer them cooked, but lately I just can’t get enough.

IMG_8068 copy

My very favorite way to enjoy a tomato is through soup. I’ve liked tomato soup for ages - way before I liked tomatoes themselves. I’ve got a confession for you - I really love tomato soup from the can. As in, the red and white can. Oh yes, I eat way too much  canned soup in the fall and winter. I’d never attempted to make it myself because I wasn’t sure I could improve on that tin can goodness. Yes, I am a bit crazy. I did just say “tin can goodness”. To my credit, tomato soup and ice cream sandwiches are just about the only things I prefer store-bought.

IMG_8192 copy

When N.E.E.T. magazine asked me to contribute a “comfort food” recipe for their fall issue, the first thing I thought of was tomato soup. I was pretty certain they didn’t want a picture of canned soup though, so I finally gave homemade a chance. And guess what? It’s so much better than the other stuff. Totally surprising, right?! ;) I’m going to be making batches of this and freezing it so I can cut the sodium glut that is Campbell’s out of my diet!

123123 copy

I kind of had no idea what I was doing with the recipe, I was just guessing but it came out terrific. I roasted the tomatoes with shallots and added thyme, because I’m on a tomatoes & thyme kick. But you could add any herb you’d like.

IMG_8531 copy-2

If you’d like to try it out (and trust me, you do), head on over to N.E.E.T. (A lot of people were having trouble accessing the recipe, so I've added it below.) The recipe is on page 140, but be sure to check out the rest of the issue. It features recipes from two of my favorite bloggers Julie from Always with Butter and Stephanie from Desserts for Breakfast. If you haven’t seen their blogs, go now! Both are outrageously beautiful.

Roasted Tomato Soup
Serve hot or cold

2 pounds fresh tomatoes, a mixture of your favorites
4 shallots, peeled and quartered
extra virgin olive oil
herbs, thyme, oregano, basil, whichever you prefer
salt & freshly ground pepper
2 cups chicken or vegetable stock
1/4 cup heavy cream

Preheat the oven to 400f. Cut tomatoes into quarters, (if you’re using cherry tomatoes, leave them whole). Spread the tomatoes and shallots on a baking sheet. Drizzle with olive oil and sprinkle with salt, pepper and herbs, gently toss. Roast for 30 minutes, or until tomatoes & shallots and brown and have caramelized.

Remove the pan from the oven and allow to cool slightly. Dump all of the pans contents into a food processor and blend until smooth. Slowly add in stock while blending. If you soup is too chunky for your liking, pour through a mesh sieve.

Pour contents into a large stock pot, add heavy cream and simmer for 15 to 20 minutes.

Garnish with pepper, herbs, and crusty bread, enjoy!

(P.S. The folks over at Terrain have recently launched a gorgeous new site design and they sent me a discount code just for you guys! If you enter "HONEYJAM" at checkout, you'll get 15% off. Hurrah!)

Tuesday, August 23, 2011

Tomato Cobbler

IMG_0240 copy-2

I can’t believe autumn is almost here. I’ve spent most of the summer busy as a bee, a little travel, a few exciting photo jobs, a new puppy, (who is currently snoozing at my feet as I type this) with little time to blog or bake.

heirlooms & on the vine

I had a few free hours this afternoon, and I spent them baking this tomato cobbler. It’s an idea I’ve had in my head for a while, a savory cobbler instead of sweet (not a very original idea, true, but new for me!), but I wasn’t sure which direction I wanted to go with it. Then I found this recipe from Martha Stewart. It was just what I was looking for.

IMG_0090 copy-1-2

IMG_0215 copy-1-2

This cobbler has it’s feet firmly planted in two seasons. It’s bursting with juicy, late summer tomatoes, but it has the feel of fall. It’s warm and filling, just the thing for when the evenings turn cool. It’s perfect for the in between. A transitional cobbler.

IMG_0129 copy-1-2

The original recipe uses a different biscuit recipe, and gruyere instead of thyme. I think gruyere AND thyme would be perfect, but I didn’t have any. If you try it out, let me know! Also, the thyme biscuits are perfect on their own. Just preheat your oven to 400, form into rounds, place on a baking sheet, and bake for 10-12 minutes.

Tomato Cobbler
Adapted from Martha Stewart
Serves 4

For the filling
extra virgin olive oil
1 large onion, thinly sliced
2 garlic cloves, thinly sliced
2 pounds grape tomatoes
3 tablespoons all-purpose flour
coarse salt and freshly ground pepper

For the biscuit topping
2 cups all purpose flour
1 tablespoon baking powder
1 tablespoon fresh thyme (plus more for garnish)
1/2 teaspoon salt
1/2 cup butter
3/4 cup heavy cream or buttermilk


Directions
Make the filling: Heat 3 tablespoons of oil in a large high-sided skillet over medium heat. Cook onions, stirring occasionally, until caramelized, about 25 minutes. Add garlic, and cook until fragrant, about 3 minutes. Let cool.

Toss onion mixture, tomatoes, flour, and red-pepper flakes with 1 teaspoon salt and some pepper.

Preheat oven to 375 degrees.

Make the biscuit topping: Whisk together flour, baking powder, thyme and salt in a bowl. Cut in butter with a pastry cutter or rub in with your fingers until small clumps form. Add cream, stirring with a fork to combine until dough forms. (Dough will be slightly sticky.)

Transfer tomato mixture to a 1 quart baking dish or medium cast iron pan. Spoon 5 clumps of biscuit dough over top in a circle, leaving center open. Brush dough with cream. Bake until tomatoes are bubbling in the center and biscuits are golden brown, about 45 minutes. Transfer to a wire rack. Let cool for 20 minutes.

Monday, April 25, 2011

Yogurt Biscuits & Breakfast Outside

5654536419_d73c5c8b3d_z-2

I can’t say anything about breakfast and biscuits that I haven’t said before. I love them both. You know what makes them even better? The great outdoors.

5654548685_31281ac1c0_z-2

5654596055_f68e695ae0_z-2

Eating outside is one of the things that makes warm weather really, really great.

5654570945_e9735d0b1c_z-2

5654560475_0b7dca3ae2_z-2

Bird songs and sunshine, the perfect accompaniment to the perfect breakfast.

bf1-2

5655164818_8295e13f24_z-3

This is another fantastic recipe from Heidi Swanson’s cookbook, Super Natural Every Day. Flakey and rich, these biscuits are pretty wonderful.

Yogurt Biscuits
From Super Natural Every Day
Makes 12-16 biscuits

1 ¼ cups spelt flour or whole wheat pastry flour
1 ¼ cups unbleached all-purpose flour, plus more if needed
1 ½ teaspoons fine-grain sea-salt
1 tablespoon aluminum-free baking powder
½ cup unsalted butter, chilled and cut into cubes
1 ⅓ cup greek-style plain yogurt

Preheat the oven to 450 with a rack in the middle of the oven. Place an ungreased baking sheet in the oven to preheat as well.

Combine the flours, salt, and baking powder in a food processor. Sprinkle the butter across the top of the dry ingredients and pulse about 20 times, or until the mixture resembles tiny pebbles on a sandy beach. Add the yogurt and pulse a few times, or until the yogurt is just incorporated. Avoid overmixing, it’s fine if there are a few dry patches. Gather the dough into a ball and turn it out onto a lightly floured surface. Knead five times and press into an inch thick square. Cut in half and stack one on the other. Repeat two more times - flattening and stacking, then cutting. Add more all purpose flour to prevent sticking when needed. Press or roll out the dough into a 3/4 thick rectangle, but no thicker; if the dough is too tall, the biscuits will tilt and tip over while baking. Cut the dough into twelve equal biscuits.

Transfer the biscuits to the preheated baking sheet leaving 1/2 inch between each biscuit. Bake for 15-18 minutes, until the bottoms are deeply golden and the biscuits are cooked through.

Monday, February 14, 2011

Peasant Bread

IMG_4794 copy-2

I don’t really have anything against Valentines Day. I like red & pinks hearts, I like chocolate, I like flowers (but not roses. I think they’re ugly). But none of those things mean love to me.

IMG_4809 copy-2

You know what does though? Spending time with the people I love. And homemade bread. Homemade bread just tastes like love, doesn't it?


IMG_4828 copy-3

So that’s what I’m doing today. Baking really good bread, and sharing it. With my family, and you too!

Happy Valentines Day!

European Peasant Bread
from Artisan Bread in Five Minutes a Day
Makes four 1 pound loaves

Ingredients

3 Cups lukewarm water
1 1⁄2 Tablespoons granulated yeast
1 1⁄2 Tablespoons Kosher salt
1⁄2 Cup rye flour
1⁄2 Cup whole wheat flour
5 1⁄2 Cups unbleached all purpose flour
Cornmeal for dusting the peel


Mixing and storing the dough: Mix yeast and salt with water in a 5 qt. bowl or lidded (not airtight) food container.


Mix in the remaining dry ingredients without kneading. You may have to use your hands to get the last bit of flour mixed in.


Cover (not airtight) and allow to rest at room temperature until the dough rises and collapses (or flattens on top), about 2 hours.


The dough can be used immediately after the initial rise, although it is easier to handle when cold. Refrigerate in the lidded (not airtight) container and use over the next 14 days.


On baking day, dust the surface of the refrigerated dough with flour, and cut off a 1-pound piece (grapefruit-size). Dust with more flour and quickly shape it into a ball by stretching the surface of the dough around to the bottom on all four sides, rotating the ball a quarter turn as you go. Allow to rest and rise on a cornmeal-covered pizza peel for 40 minutes.

Twenty minutes before baking time, preheat the oven to 450°F, with a baking stone placed on the middle rack. Place an empty broiler tray on any other shelf that won't interfere with the rising bread.

Sprinkle the loaf liberally with flour and slash a cross, "scallop," or tic-tac-toe pattern on the top, using a serrated bread knife. Leave the flour in place for baking; tap some of it off before slicing.

Slide the loaf directly onto the hot stone. Pour 1 cup of hot tap water into the broiler tray and quickly close the oven door. Bake for about 35 minutes or until the top crust is deeply browned and very firm. Smaller or larger loaves will require adjustments in baking time.